Photos
Keep each listing's photos with it, in order, and download them as one zip. Photos need a workspace, which a 14-day Team trial gives you.
Where photos live#
Photos are saved in your workspace, not in your browser, so they need an account. In the free tool, the Photos card shows Add photos, and clicking it explains what a workspace is and offers a 14-day Team trial. It never blocks anything that is free, and Not now, keep writing closes it.
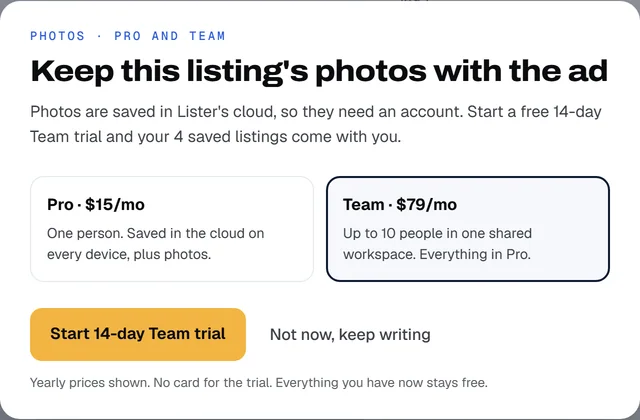
In a workspace, photos work on every plan, including the trial. Everyone in the workspace sees the same photos for a listing.
Add photos to a listing#
You need a saved listing first. Photos belong to a listing, and until it is saved the card says "Save the listing to add photos."
- On the My listings tab, click Edit on the listing. The Write an ad tab opens with the Photos card below the form.
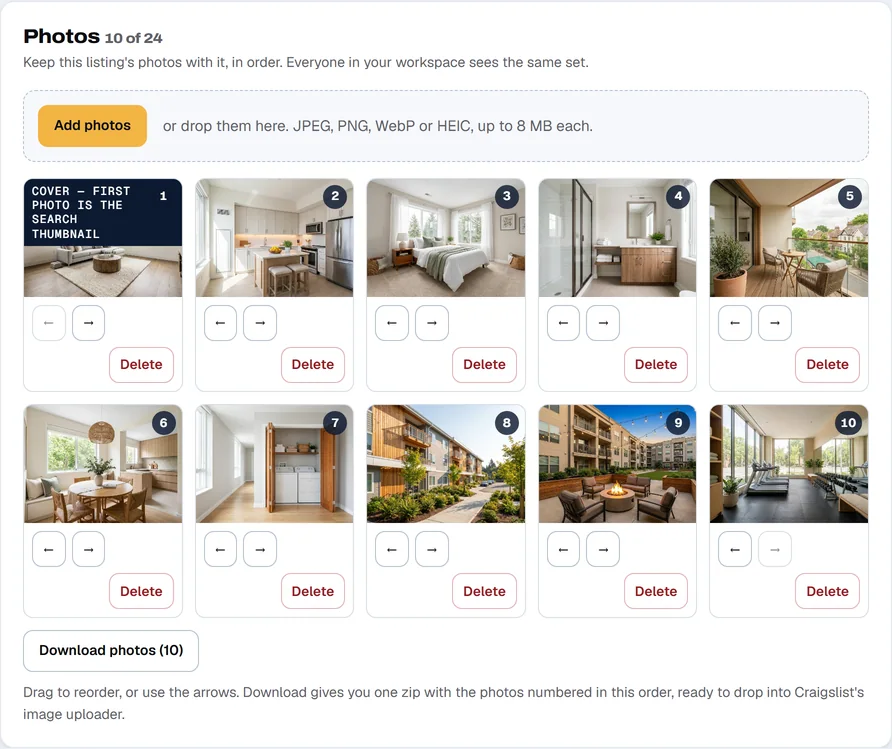
- Click Add photos and choose one or more pictures, or drop them onto the card.
- Each picture shows its progress while it uploads, then appears in the grid.
Which pictures work#
- JPEG, PNG, WebP and HEIC, up to 8 MB each. HEIC opens only in browsers that can read it, such as Safari. If yours cannot, save the picture as a JPEG first.
- Before a picture leaves your device, your browser shrinks it to 2000 pixels on the long side and saves it as a JPEG. That keeps uploads fast and removes the camera details and location that phones hide inside photos.
- Up to 24 photos per listing, which is the most the posting site takes. Each shrunk picture can be up to 3 MB. A workspace can hold up to 2 GB in all.
Put them in order#
The first photo is the cover: it is the thumbnail people see in search results, so lead with your brightest one.
- Use the ← and → buttons under a photo to move it.
- Or drag a photo to a new place.
The order is saved as you go and is the same for everyone on the team.
Delete a photo#
Click Delete under the photo. A message at the bottom of the screen says "Photo removed" with an Undo button. You have a few seconds to undo it. After that it is gone.
Deleting a listing deletes its photos too.
Download all photos as a zip#
Click Download photos under the grid. You get one zip with the pictures numbered in the order you set, ready to drop into the posting site's image uploader. Downloads work on every plan, even when a workspace is read-only.
If it did not work#
- "Isn't a photo." The file is not a JPEG, PNG, WebP or HEIC picture.
- The photo limit. At 24 photos, Add photos is switched off and the card says "This listing has all 24 photos." Delete one to add another.
- The card says the workspace is read-only. Uploads stop with all other changes when a plan has lapsed. An owner can choose a plan. See Plans and billing.
- You are offline. Photos upload when you are connected. Try again when you are back online.